top of page


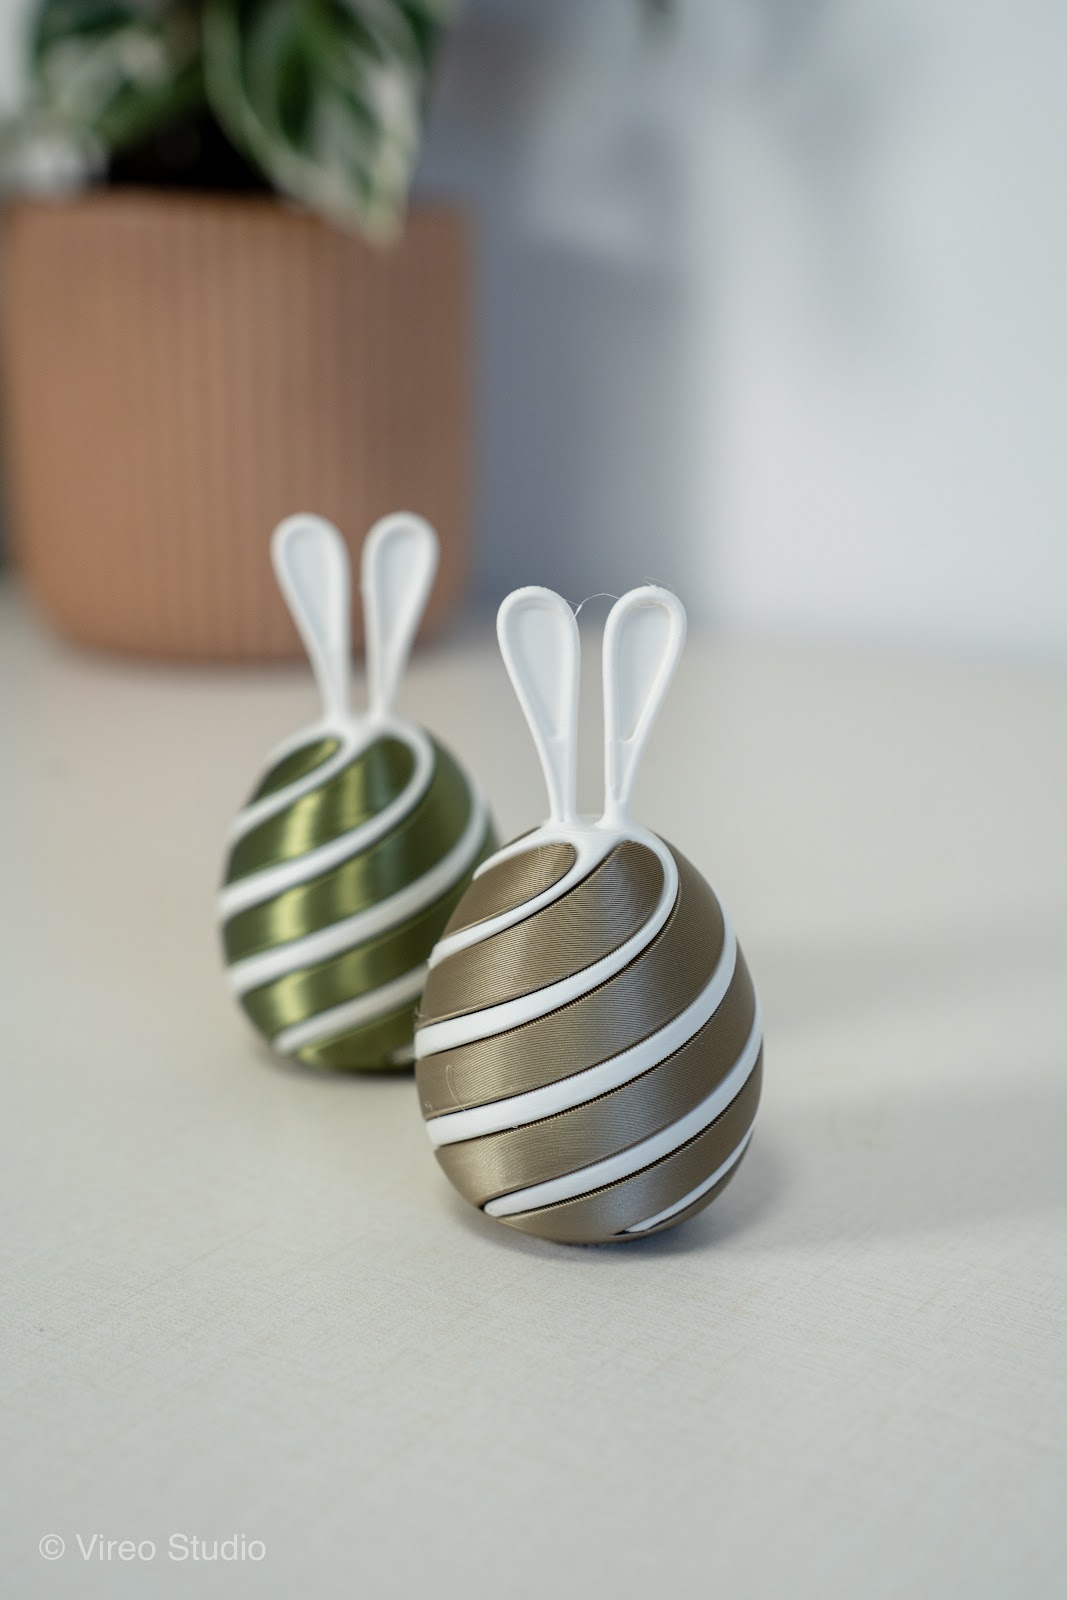
Easter Eggs (For Hydro-dipping)
3D print design by
Creaserra
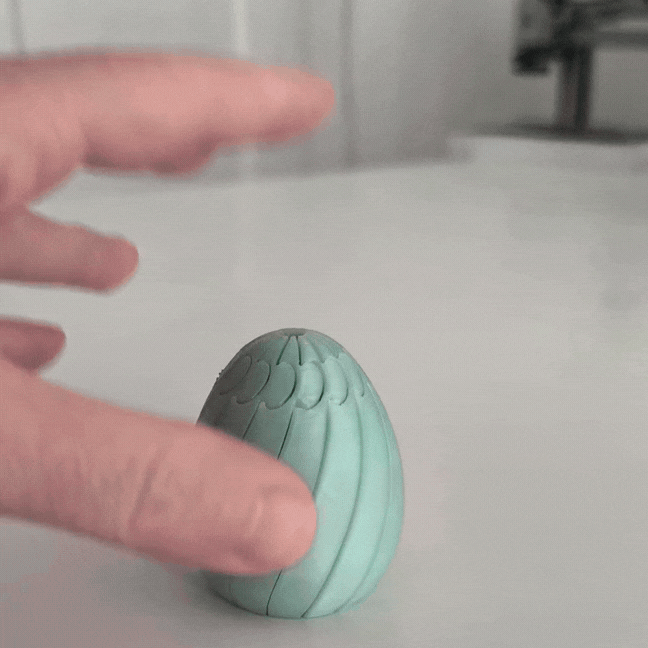
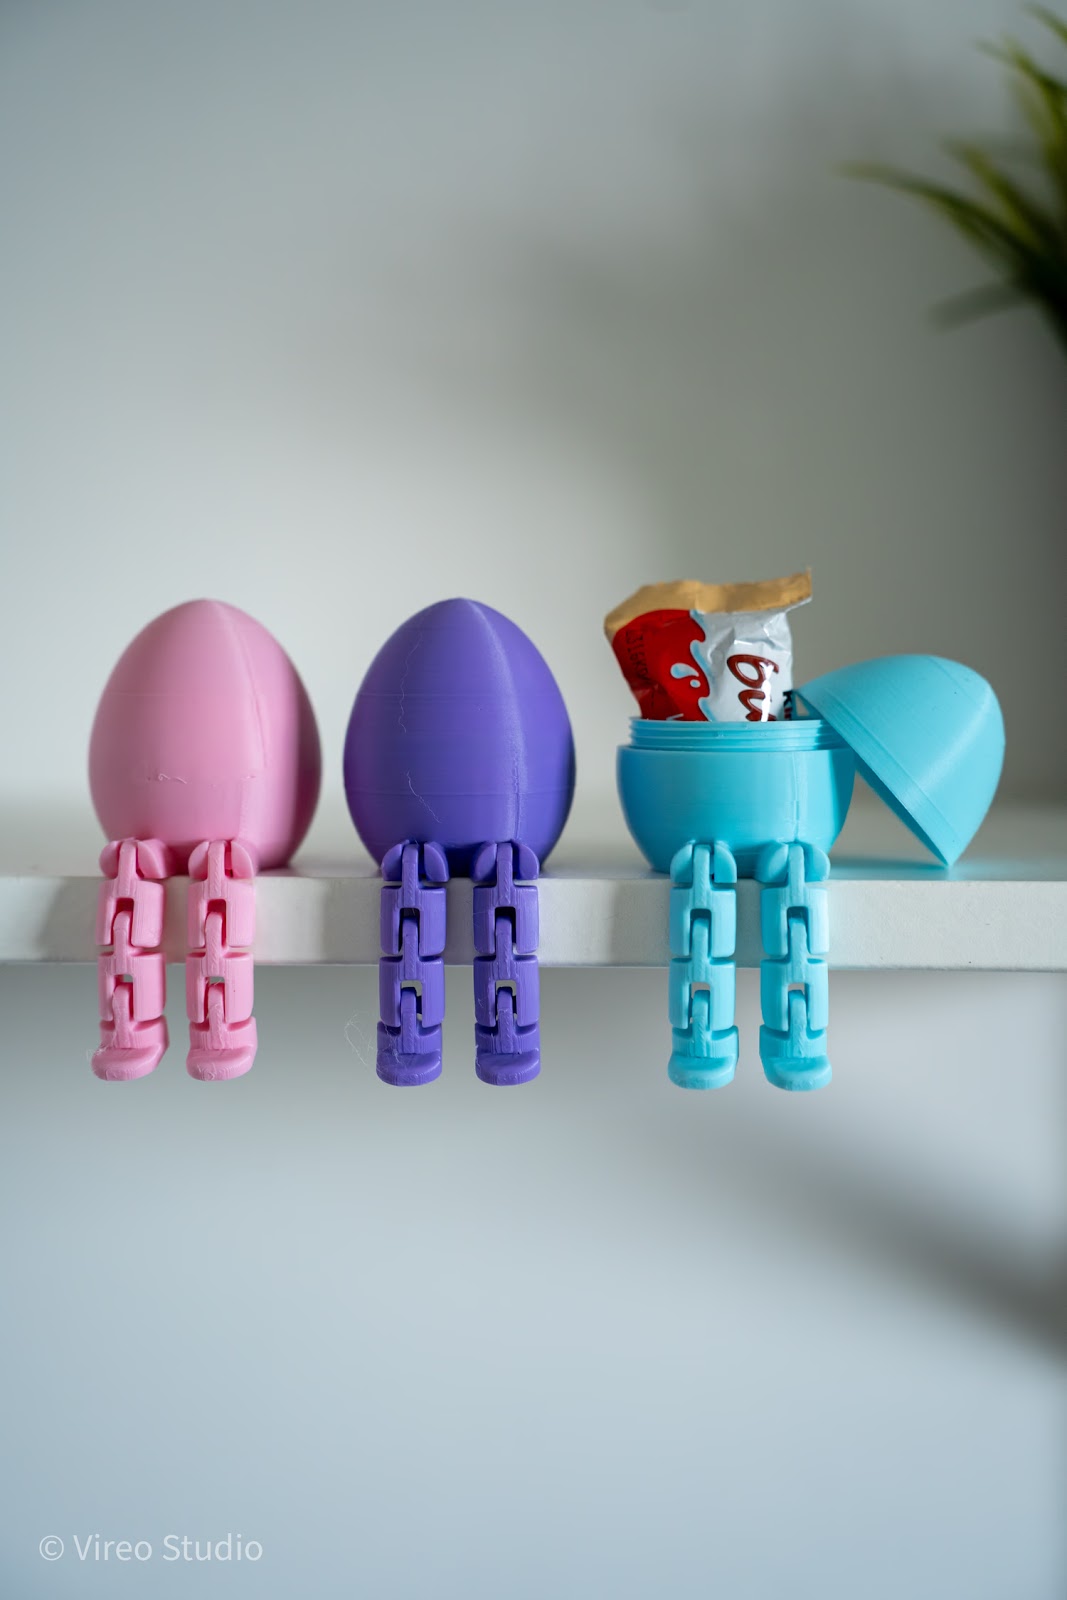
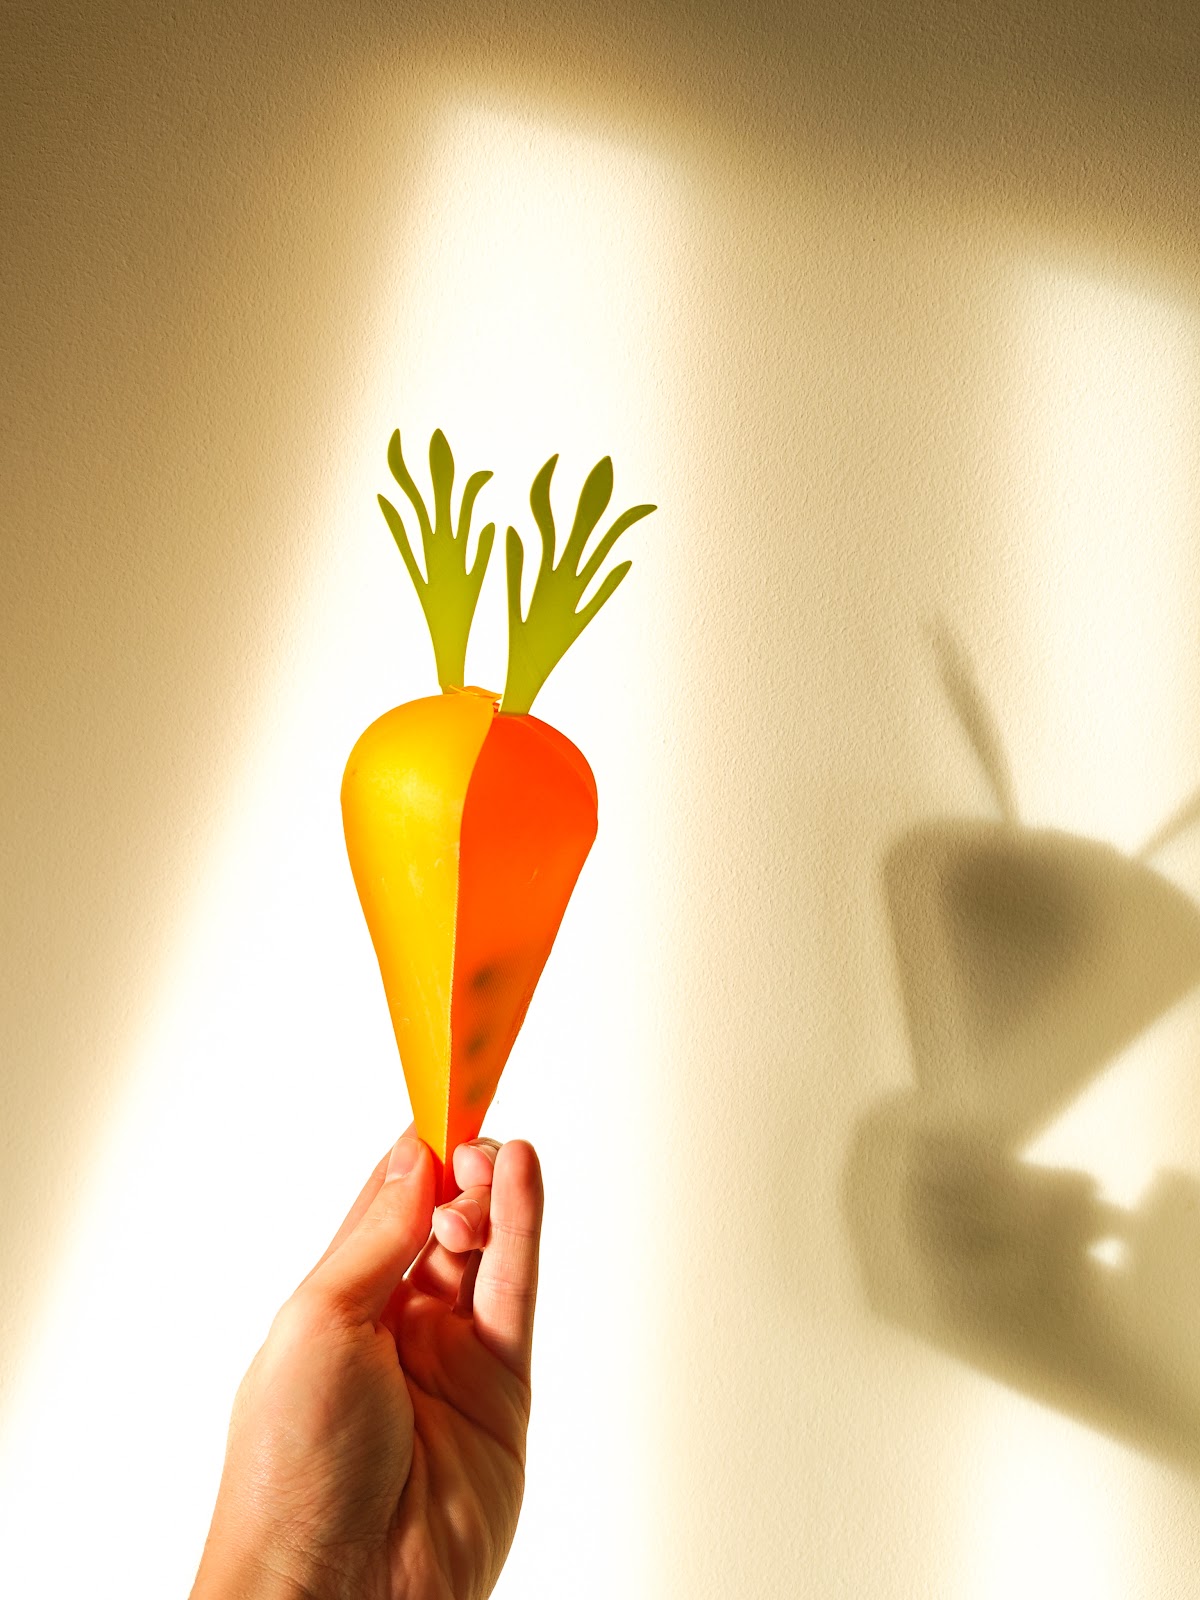
These 3D-printable Easter eggs are designed to be fully customizable using hydro-dipping. With a size of approximately 95 mm in height and 70 mm in width, they offer a perfect canvas for unique, colorful designs. Whether you use them as decorations, secret containers, or for an Easter egg hunt, they provide a fun and creative experience for all ages.
The design consists of three parts: a hollow egg with a screw thread at the bottom (for both sealing and attaching the painting arm), a screw-on cap to close the egg, and a threaded arm that serves as a handle for dipping during customization.
How to customize with Hydro-dipping:
1. Print as many eggs and caps as you like—white filament is recommended for easier painting.
2. Print only one arm, as it will be reused for the painting process.
3. Attach the arm to an egg by screwing it into the bottom thread—this will serve as a handle.
4. Apply a primer spray to create a smooth surface for the paint.
5. Prepare a container of water and spray different colors of paint onto the surface, creating a unique pattern.
6. Dip the egg into the water using the arm, then remove it—the paint will transfer onto the surface.
7. Let the eggs dry completely—once dry, the paint will be water-resistant and long-lasting.
8. Unscrew the arm, insert small candies or messages, and close the egg with the screw-on cap.
For more details and video tutorials on hydro-dipping, check out my Instagram!
Get commercial license with
HiveCommunity


Print & Sell this Design with HivePlus

Only 50 Licenses
Full commercial access with limited global sellers.

HQ Media Content
Media library of images, videos, and written content.

1:1 Collaboration
Personal support access to a private seller community

3D-Biz Support
Expert content & live sessions to help you grow.
Anchor 1 - plans
Dynamic page plans
Join
HivePlus
-
Only 50 HivePlus licenses globally
-
Rights to sell across any platform
-
Content bank of pics & vids
-
Biz-dev consultancy & sales data
-
+750 HiveCommunity STL Library
*With CubeeTrust:
A royalty system that rewards and motivates your designers by sharing 10% of sales with them


900+ Model catalog
Royalty-free selling rights
30+ new designs/month
Private seller community
Biz-dev/learning tools
HiveCommunity

Join the
.png)


bottom of page